User profile
You can view and edit your profile information by navigating to the Your profile page under the People section (if this feature is turned on) or by clicking on your avatar at top-right in the screen. Upon navigating to your profile, you will land on the Overview tab displaying your profile information.
Profile setup
The Overview page contains all of the high-level profile information such as your profile picture, role, manager, skills, and charge rate. Some fields are configurable, and some are set by agency admins.
It is important that you set up your time zone so every time displayed on the platform is established on your time.

| Field | Description |
|---|---|
| Standing | Determines the account status. Set by admin users. |
| Manager | Specifies the manager for your profile. Clicking shows a drop-down of agency team members to select. |
| Pronouns | Free text field to enter your pronouns. This will be displayed by your name when users view your profile icon within the application. |
| About | Free text field to write an "about me". This is viewable for all members in the project and your agency. |
| Timezone | Active timezone |
| Dashboard projects view | Radio button selection to determine which projects to display on the dashboard view in the Home tab |
| Default preview to view-only | On the project page > Preview tab, if this toggle is OFF it will default to Pinning mode. If it is toggled ON it will default to Viewing mode. |
| Skills | Add pre-configured skills to your profile. To search a skill, begin typing. Skills are divided into sub-categories of Skills, Tools and Products within the search bar. |
| Access | Contains profile access information, including role, email verification status, and an archive status. Admins have the ability to archive accounts. |
| Charge rates | Charge rates are set for the profile as a decimal multiplier. This value is recorded in credit denomination, which means its value in dollars will change if you change your global credit price setting for your agency. Charge rates for specific roles are configured in agency settings, and the user-specific rate can be configured by setting. |
Additional profile setup
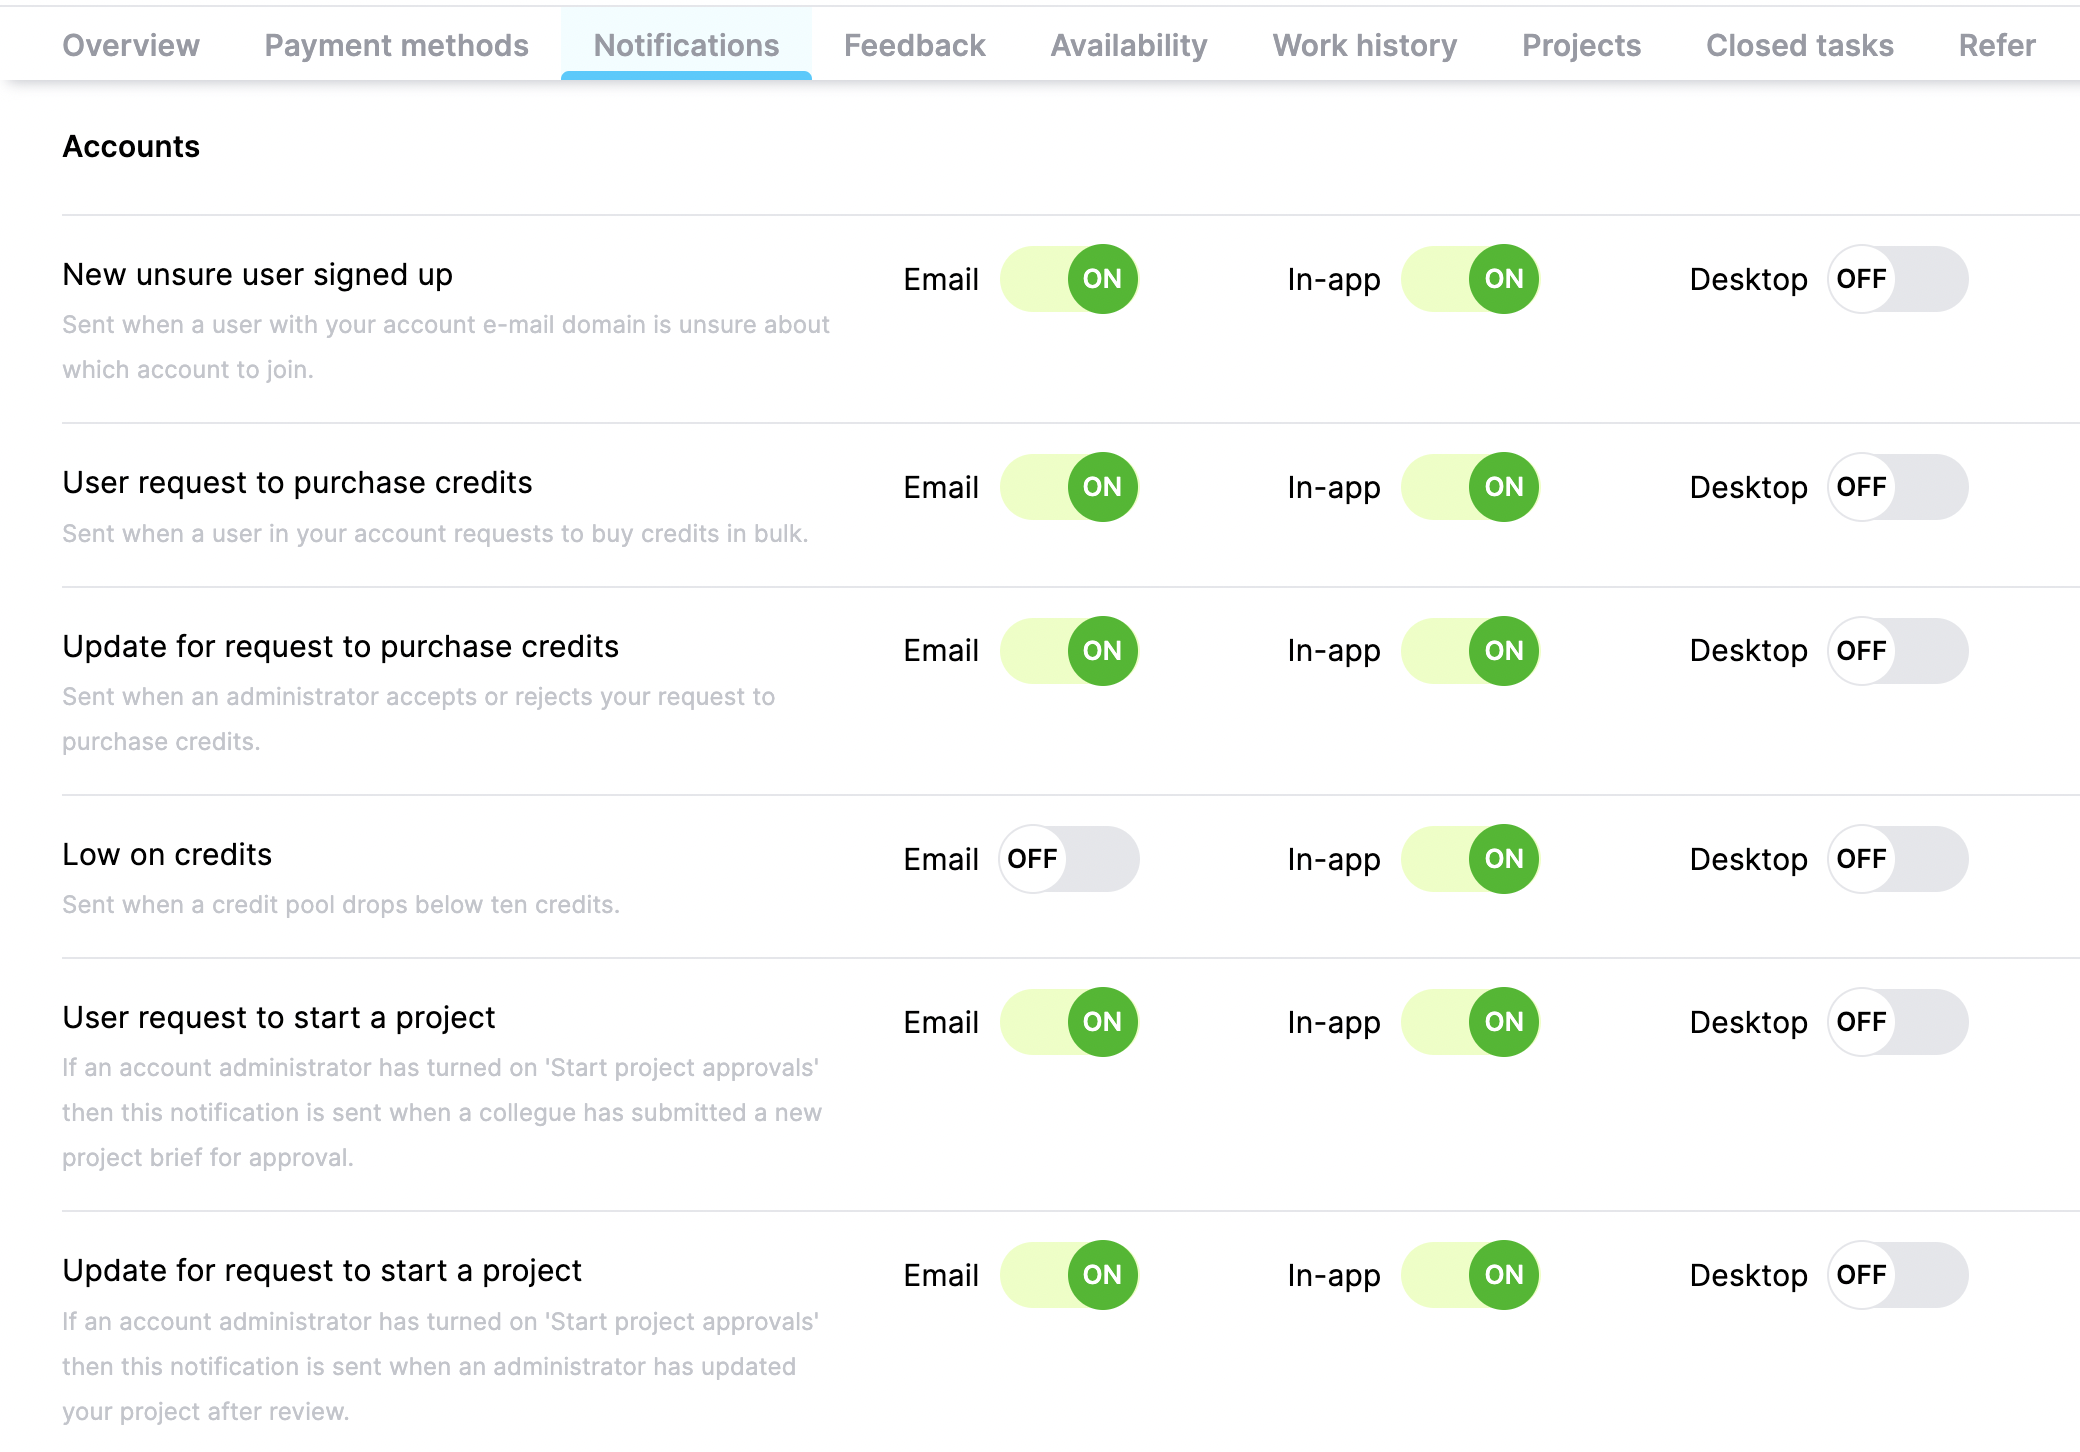
Once your basic information is entered, you can set your notification preferences by clicking the Notification tab, and your availability by clicking Availability.
Notifications
Under the Notifications tab, you will see a list of many different notification types and toggles on/off for how you’d like to receive notifications. You can decide to receive notifications by Email, In-app, or on your Desktop. As you get acclimated to the platform and workflow, you will get a better understanding of what makes sense for you and what is not useful. To start, we would recommend keeping all Email and In-app notifications turned on; then once you’ve gotten a feel of what works for you, you can turn them on or off to fit your needs.

Work availability
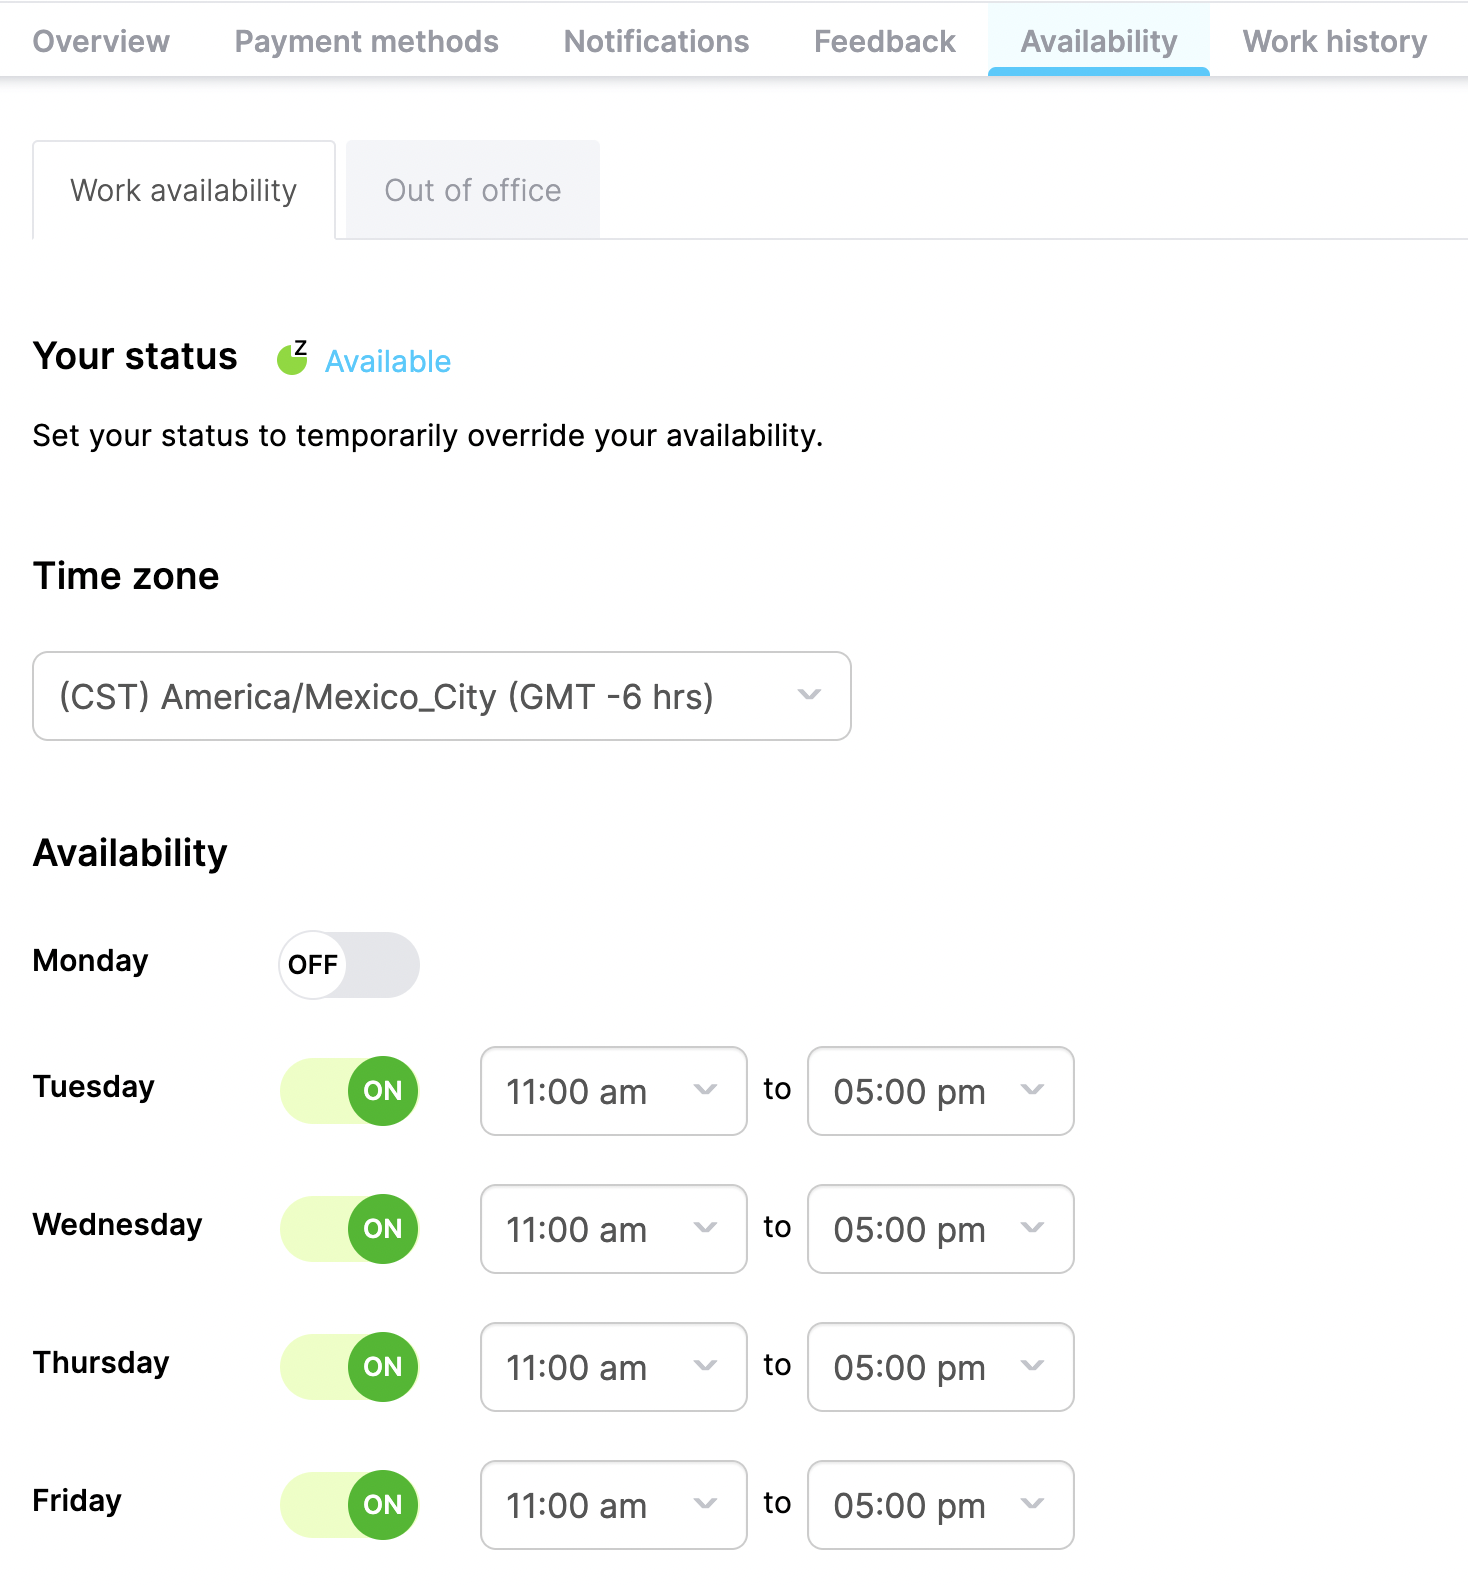
The work availability tab is one of the most important ones to set up quickly before you start working. It lets you define both the timezone where you are going to be working as well as the days of the week and available time during the day. This is important so that PMs know when to reach out to you with work and when not to.
Of course, this is not set in stone, and you can change it anytime. If any day you feel like working less — or more — just talk to your PM and let them know.
Also, it is expected that new Active designers will have a ~20h+ weekly availability, so take that into consideration when setting up your preferred working hours.
You can add any dates that you will be out of office (OOO) to the Out Of Office tab within the Availability tab. Please also always communicate directly to your PM/manager ahead of any OOO time.

Updated 10 months ago
